1. label 태그에 스타일 적용하기
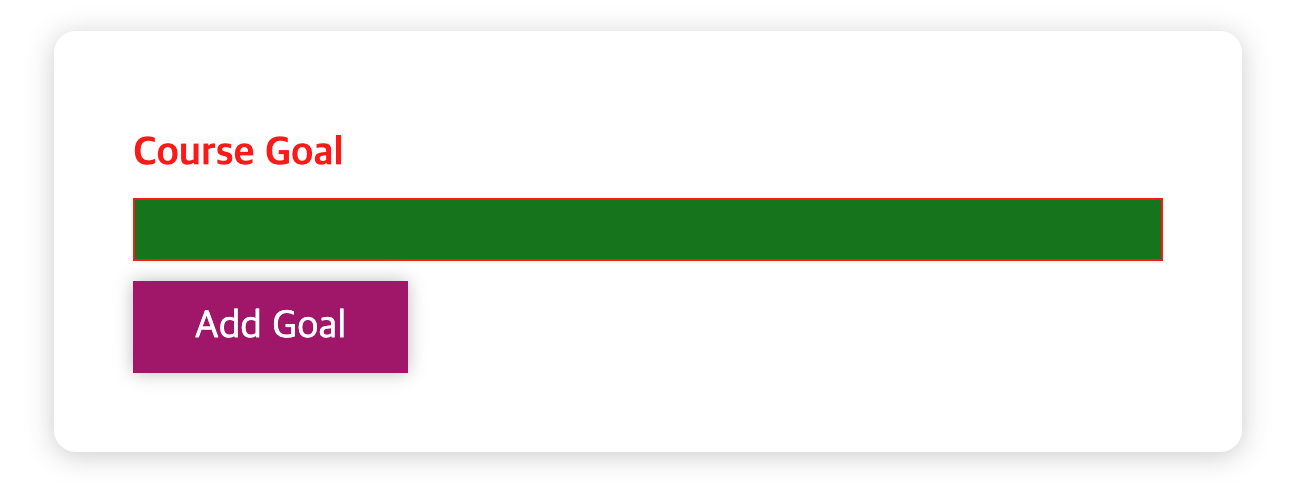
input에 아무것도 입력하지 않았을 때, Course Goal text red, border red, color green 으로 바뀐다.

  return (
    <form onSubmit={formSubmitHandler}>
      <div className="form-control">
        {/*아무것도 입력안하면 글자가 빨간색으로 바뀜-> 스타일 프롭스 추가해서 요구되는 객체를 전달한다 */}
        <label style={{ color: !isVaild ? "red" : "black" }}>Course Goal</label>
        <input
          style={{
            borderColor: !isVaild ? "red" : "black",
            background: !isVaild ? "green" : "transparent",
          }}
          type="text"
          onChange={goalInputChangeHandler}
        />
      </div>
      <Button type="submit">Add Goal</Button>
    </form>
  );
};
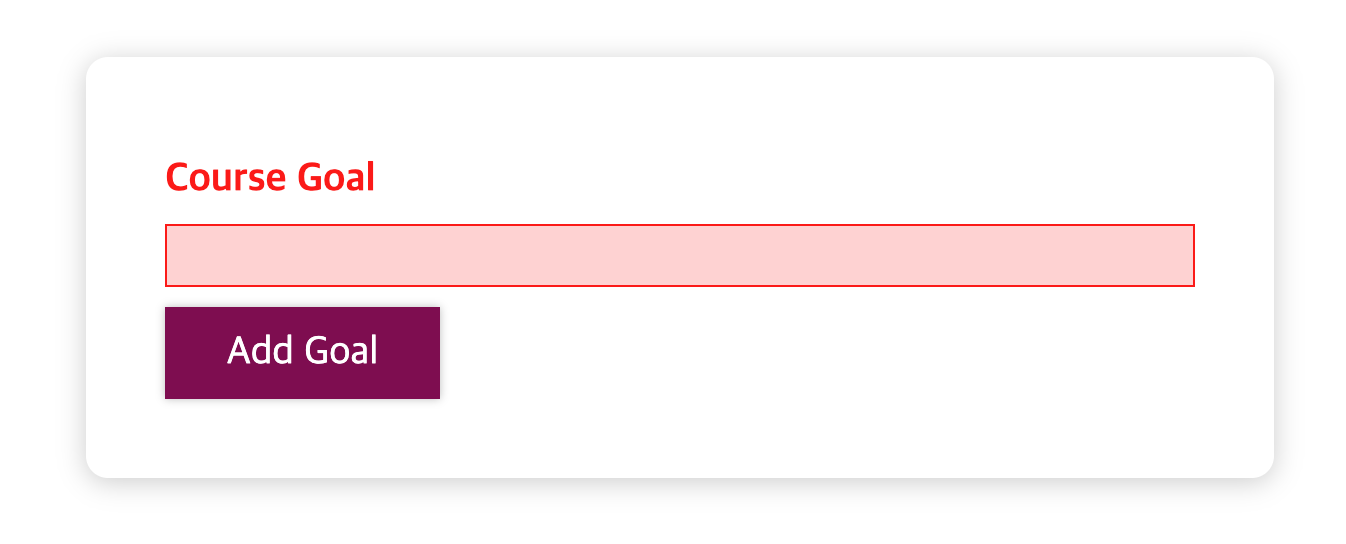
2. invaild 클래스를 동적으로 추가하기
CourseInpus.css

.form-control.invaild input {
  border-color: red;
  background: #ffd7d7;
}

.form-control.form-control.invaild label {
  color: red;
}
CourseInput.js
const CourseInput = (props) => {
const [enteredValue, setEnteredValue] = useState("");
//사용자가 입력한 것이 유효한지 불리언 타입으로 체크
const [isVaild, setIsVaild] = useState(true);
const goalInputChangeHandler = (event) => {
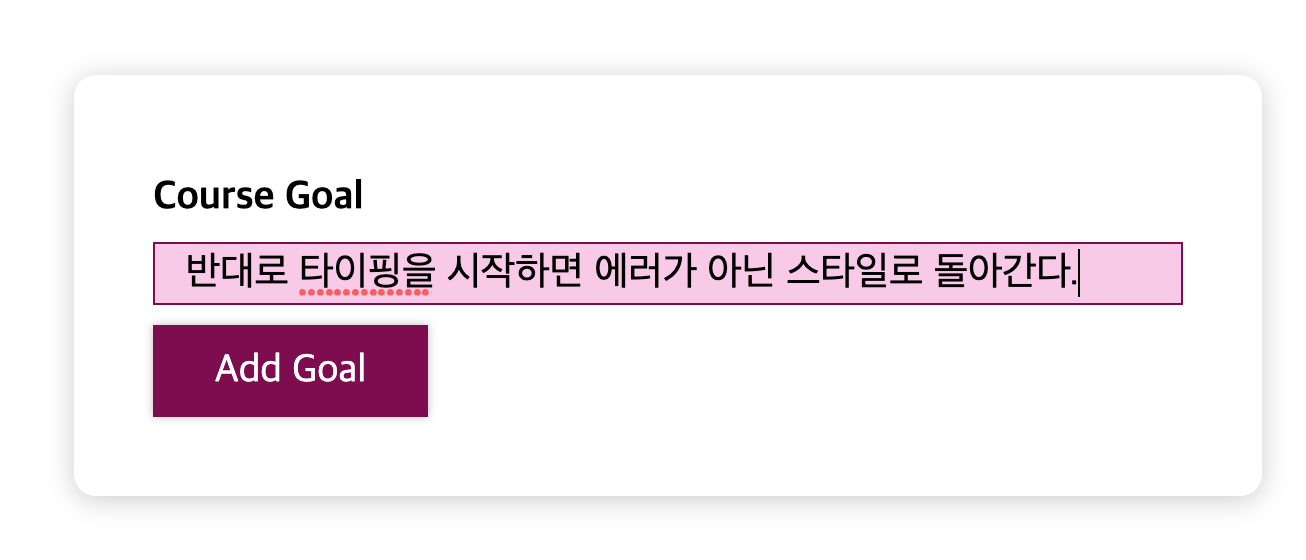
//인풋에 입력이 시작되면 입력이 유효한 것을 볼 수 있다.
if (event.target.value.trim().length > 0) {
setIsVaild(true);
}
setEnteredValue(event.target.value);
};
const formSubmitHandler = (event) => {
event.preventDefault();
//공백입력한 경우 제외하는 메소드 trim, 0이면 입력값이 비었다는 말
if (enteredValue.trim().length === 0) {
//유효하지 않으면 false
setIsVaild(false);
return;
}
props.onAddGoal(enteredValue);
};
return (
<form onSubmit={formSubmitHandler}>
<div className={`form-control ${!isVaild ? "invaild" : ""}`}>
<label>Course Goal</label>
<input type="text" onChange={goalInputChangeHandler} />
</div>
<Button type="submit">Add Goal</Button>
</form>
);
};중괄호를 추가하여 템플릿리터럴 사이에 콘텐츠를 넣으면 된다.
isVaild 값이 true가 아닌지 체크할 수 있는데 앞부분에 ! 느낌표 붙여준다.
'React' 카테고리의 다른 글
| 리액트 리덕스 useMemo 경고 (0) | 2022.08.31 |
|---|---|
| React Hooks 적용, Custom Hook과 React.lazy()와 Suspense를 이용하기 (0) | 2022.07.30 |
| React Hooks useMemo (0) | 2022.07.28 |
| React Diffing Algorithm 비교 알고리즘 (0) | 2022.07.28 |
| React 심화 Virtual DOM (0) | 2022.07.27 |